Thursday, June 26, 2014

Inglot Cosmetics Freedom System Blush in shade 34 [Why you need this for Summer]

Inglot is a brand I absolutely love [check my reviews here]


I just wish they had stores here in Toronto - buying something from their website is hard because
a) No swatches or good pics  b) the most pathetic naming system- who names products by numbers these days!


I am loving this peachy coral warm-toned blush so much these days - I would say unless you're very pale skinned, this is a blush you should check out. This blush has some golden shimmers but they are not harsh or weird and just adds to a subtly highlighted cheek look.


Application is a breeze with this blush. The texture is very silky - I have read reviews where people compared it to MAC blushes with points awarded slightly higher to Inglot blush.


Overall: I love it. I am getting more blushes and lippies and more from Inglot as soon as they announce a store sale or as soon as they start a store in Toronto -which I hope is pretty soon!

If you're in Canada, you can shop them here - Inglot Canada Website

Wednesday, June 25, 2014

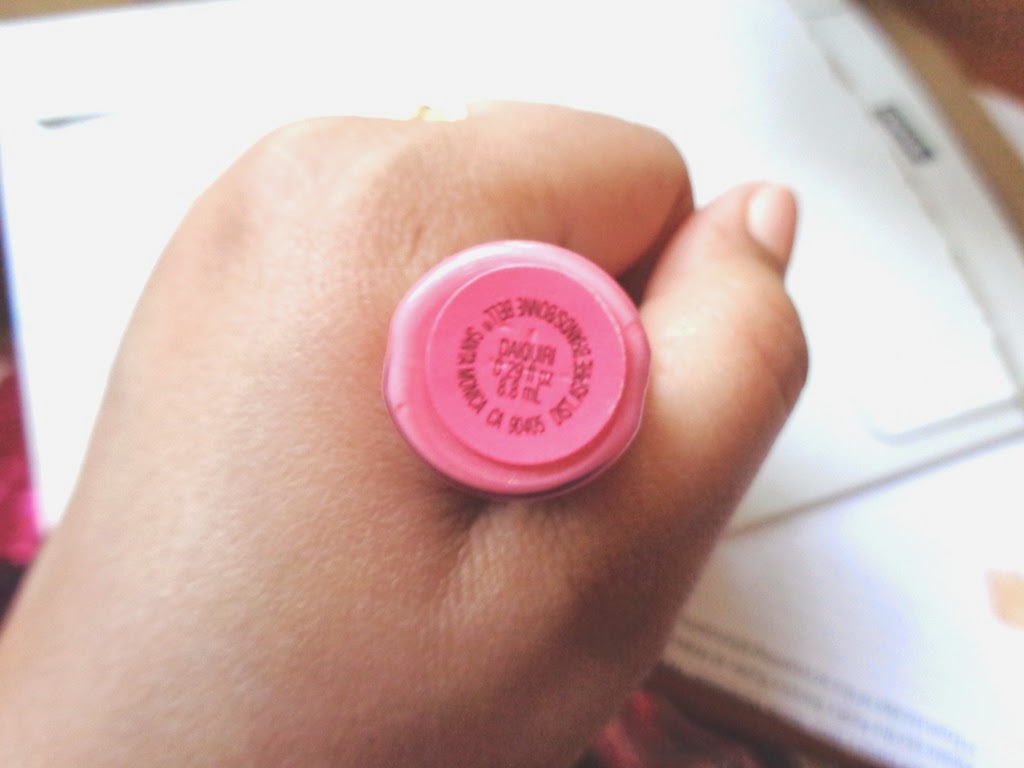
New in Town: Bonne Bell Lip Lacquer in Daiquiri [a.k.a. What Not To Buy for $6 ]


It feels like all I am doing nowadays are "What Not To Buy" posts.. :( Good for you guys cos you can steer clear of the stuff but pretty bad for mah purse.. Ah well..here is another one to the collection.


For a company that started in 1927 and has seen pretty much everything on the evolution of makeup, Bonne Bell doesn't seem to have really got the game in hand yet. The 2 products I have tried [click for review] so far, has been super duds. And here is yet another one to the gang. I have a new lipstick to try and some how I don't have much hope for that one!


You can get the product info here; it says it retails for $3.95 but I got it for $6 from my local Real Canadian. 

My Experience:

The Good...

Daiquiri is a pretty cool toned coral pink shade with golden shimmers. Sounds pretty right? It is, really. The color is a great summer shade and when I can get over my cribs about this product, it looks good on my lips.  


I also like the cute and handy packaging.
The Bad... 

Abra ca dabra... 
Zimboooooombaaaaaa....
Make me a gloss Sticky Sticky Sticky, 
Make me a gloss Goopy Goopy Goopy, 
Make me a gloss Smelly Smelly Smelly,
Make me a gloss Weirdly Sweet, Weirdly Sweet Weirdly Sweet..

Lo! My wish is fulfilled! 

The Ugly...

Look at that wand.. just look at it... and tell me, how anyone can use this!  
Reminds me of some bug with lot of legs.. yeeeeeesh.....


I feel like a kid trying to draw pictures with a useless brush that comes with a tiny cheap paint box!

Overall: If you like the color and the glossy look and has some sentiments towards Bonne Bell, go for it. Otherwise, I see no reason to buy this.


Sorry for the poor image quality of pics in this post- I had to take this quickly as my friend's kid liked the tube and wanted it, so I was trying to take pics before she grabbed it.

Disclaimer: This review is only intended for this particular shade of this product. Also I have no way of knowing if I picked a rotten one out of other good stuff, I can only review what I have. 

NYX Butter Glosses in Tiramisu and Cherry Pie

After using these glosses, I wondered - what exactly makes them sooooo irresistible? 
Is the pretty packaging? 
Is it the beautiful gliding formula of the gloss?
Is it the range of 22 non-shimmery lip shades with a great mix of pastel and bright colors?
Is it the non-sticky creamy formula?
And I think I hit on the answer when I say - its all in the name! 


I mean, can you resist a lip gloss, so prettily packaged with the name "Butter Gloss"? 
(Lets keep aside the fact that trying to glide a chunk of butter on the lips feels pretty yucky and not fun. )
Just the name is enough to conjure up an image right from the pages of a glossy magazine.... Awesome marketing, NYX! Kudos!


You can read what NYX has to say about these glosses here
Price: $5 USD, they have lots of pretty shades too!

My Experience:

Let me start with what I don't like about these 1st, cos thats a short list!
  1. NYX don't ship to Canada and Rest of the world, so we miss out on all the good stuff and sales. I don't consider their "partnership" with MyUS as a shipping option - thats too expensive to buy these pocket friendly products!
  2. As much as I love the sturdy packaging, I wish it was partly clear so I could see the product inside :(
  3.  Hmmmmmmmmmmmm.... thats it? Really?

 Now for the good stuff:
  1. Pretty cool packaging - its fun to line them up in the drawer! :)
  2. Lots of pretty shades to choose from
  3. Non-sticky application with a beautiful glossy finish
  4. Average staying power of 2-3 hours but provides longer lasting hydration - no need for lip balms with these babes
  5. One of the most comfortable-on-lips formula, especially from drugstore

Tiramisu is a pretty dull shade for my skin tone, but could be a nice MLBB shade for paler cool toned skins. 
Its a cool toned nude 'Dusty-Rose'-ish pink-ish brown.


Cherry Pie is a beautiful Orangey Red, which makes it a great day wear for Summer.


Overall: Well, what is not to love? This is probably one of the best products from NYX. If you don't have them yet, try them soon, cos you're really missing out!

Tuesday, June 24, 2014

Ipsy June 2014 Glam bag - "Pretty in Paradise" featuring the bag designed by Rebecca Minkoff

After I got this bag,  I realized that I rarely try out the various items I get from Ipsy - its like I just like getting new stuff in mail but can't go about using it [cos I am a lazy lazy lazy bug]. Anyways, lets dig into this month's Ipsy.

Ipsy is like a dear lil Santa that visits every month [on paying $15CAD of course but thats just a technicality] and even when I don't care much about the stuff inside, it still makes me happy to see the shiny pink package. 


This month's theme was Summer and beach paradises with Michelle Phan's video on Beach Essentials  kinda setting the mood- I don't know what all things she has done to look like this but she looks really amazin! Since I am planning a trip beach next week, this video and bag comes at a good time - let's see how useful it is!


Highlight of this bag has been - well, the bag itself. Designed by Rebecca Minkoff [never heard of her till this month's Ipsy, I should start reading Vogue or Instyle more], this bag has received so much attention in the blog world that it was probably inevitable that it disappoints, slightly..


The black base with pineapple print meant for a Hawaii theme, is very pretty and I love it. But I don't know if I should call this unique or designer stuff.  I mean -its just a black pineapple print bag with normal texture and red interiors. I like the red interiors though, but designer -really? I also found a bag in her website that may have been designed at the same time!

But its still a fun makeup bag to carry to beach- so thats in!

The other items in the bag are :
Be A Bombshell Lash Out Mascara
DERMAdoctor DD Cream Dermatologically Defining BB Cream with Broad Spectrum SPF 30
Marc Anthony Dream Waves Beach Spray
Nicka K New York Shimmer Eyeliner in Green
NYX Butter Gloss  in Eclair


Out of this, the stuff I really want to try are the eyeliner and mascara. But neither is very exciting - product wise or color wise.
NYX butter gloss is nothing new and I already have a lot of shades, in fact I am reviewing 3 this week. 

The DD cream  may be good but I don't know how I can review it or even get a good use out of it, considering the size. Unless I find it performing that well, its just Meh for me. As for the beach spray - I am not a fan of the look [basically cos I cant get it right :)sheer jealousy].


So out of the 5, 3 is okay dokey and 2 is so so. Which makes this a good bag for me, but nothing exceptional.
I might decide to take the eyeliner because you can never have too much green eyeliners on a trip to beach :)


I wish Ipsy would start introducing all the new brands  - which was one major reason for signing up with Ipsy, instead of bringing the same Ol' Ol' brands. Hope some day I can open my Ipsy and find a Fyrinnae or Dose of Colors or Holika Holika in it!

If you wish to subscribe to Ipsy, this is my referral link; hope you like it as much as I do!
You can also read my other Ipsy reviews here.

Monday, June 23, 2014

Summer Skin Care:Get that Glow with these Super-charged DIY packs for your whole body

Disclaimer: Not even the most luxurious skin care ritual can replace a healthy well balanced diet, sleep or active life style, so all the below tips are in addition to that yummy greek salad, zzzzzzzzzzz and yoga! :)

Summer is when you have probably the least amount of time to spend on your skin care what with all the vacations & stuff but is unfortunately also the time when you gotta really put some efforts into pampering your body so you can glow in the Sun shine.


My philosophy for Summer skincare is - pack a punch. When I finally get around to do some skin care, I want it to be super-performing.
Here is what I have been trying for my face, skin and hair [ this is only DIY stuff and its not a comprehensive list, I definitely use many other products]

 For Face 

Stage 1: Preparation
Wash your face with a mild cleanser, which does not dry your skin. 

Next, rub all those dead cells away with a natural exfoliant - I prefer using a mix of rice powder, and yoghurt.

Apply your favorite skin care oil. Mine is a mix of Jojoba, rose hip seed oil and grape seed oil. 
Make sure to warm it before application and massage it well onto the clean skin.
Leave for 5mins.


Stage 2: Applying the face pack

This is one of my favorite summer skin care packs: 
Ingredients: Slices of pumpkin, beets, carrot and papaya, black cherry or raspberry,  coffee powder [1 tbsp], cocoa powder, coconut milk or natural milk powder
 Mash up everything in a blender with water [or preferably rose water]  till it becomes a creamy thick puree.
 If you have acne, add a drop of tea tree oil into the mix before application. If you have sun tan, add some drops of lemon juice & tomato juice to the mix.

Make the face pack and leave in the fridge at least 15mins before the application. Remember to make this fresh every time, don't use a pack older than 4-5 hours.

Apply the face pack and leave it on for at least 20mins or till it becomes really dry. 
While the mask is on your face, try to rest and avoid any activity. 
Softly wash off the pack.

Stage 3: Moisturising the skin

After applying any pack, its important to bring back the moisture and lock the goodness inside. 
I apply a mix of a serum and skin care oil. 
After application remember to lightly massage your skin.

How do you look now? Got that glow? :)
 

For Body

Lets face the truth - no point if you have the most glowing face, unless your body and hair also look great. I don't know about you, but when things get busy I tend to care only for my face & hair and ignore my body. 

This pack is aimed at making your body feel loved and cherished..

Stage 1: Preparation

Take a shower to clean your body. 
If you don't want to wash your body twice, you can also use a wet towel dipped in hot water to clean all over your body.
Use a body scrub to remove all the dead cells.

Apply your favorite skin care oils. Mine is a mix of Coconut oil, jojoba, avocado and a dash of grape seed. 
Warm the oil before application and massage it well onto your body


Stage 2: Body Pack 
Ingredients: Rice powder, coffee powder[2-3 tbsp], cocoa powder [2 tbsp], coconut milk, 4-5 almonds soaked overnight, sliced potato
Mash up everything in the blender to get slightly thick creamy pack. If you wish to get an exotic scent, add Jasmine or Ylang Ylang oil to the mix
Apply the pack all over your body. If you wish to remove any tan, add a juice of 1 lemon and 1 tomato to the mix. Leave the pack on for at least 15-20mins.
Remember not to use soap while washing off the pack. 
Once dry, apply your favorite body cream.

For Hair

This is a hair care pack I learned from my Grand ma. She had the most awesome shiny black hair even when she hit her 50s! Remember that this is not enough to get shiny hair, you have to eat and live healthy cos nothing shows the state of your internal health like your hair and nails.
 
 Stage 1: Preparation

Before you apply any hair oil, make sure your scalp is not sweaty. If so, leave it for drying.
Also, if you've sinusitis or a tendency to get cold very often, avoid applying too much oil and  reduce mask application time by half.

Mix your favorite hair care oils. 
Mine is a mix of - Coconut Oil, Pure Olive Oil and Jojoba Oil

This is an optional step before applying the oil; however its amazing, so try if you can. Always make a fresh mix.
Take an iron pot and heat it on medium flame. Add a dash of butter and add any or all of the following herbs: Holy Basil, Fenugreek and Rose mary. After 2mins, add some coconut milk and heat the mixture till the coconut milk starts loosing the white color and turns clear. Take the pot off the heat and leave it to cool.Once its warm to touch, filter this and add the oil mix to the above hair oil mix.

Warm the oil mix and apply on your scalp [not hair] with soft circular motions. 
While applying oil, make sure you apply with your finger pads and not nails. 


Stage 2: Hair Pack

Ingredients: 4-5 almonds soaked over night, fenugreek powder, spinach leaves, hibiscus leaves and flower [if you can get it, its awwwwesome!], henna powder or leaves, curry leaves, mint leaves and sea weeds soaked in water  
 Use as many of the above ingredients. If you suffer from scalp infections or dandruff, mix in some tea tree oil. Mash everything together and apply immediately. Leave for 20mins at least and wash off.
To increase the efficacy of this hair pack, wrap a hot towel on your hair for 10mins. If you don't wish to spoil your towel this way, use a hair dryer for 5mins towards the end to get the same heating effect.

Don't use a shampoo while washing off the mix. If you find the hair too oily for your liking, use a mild gentle shampoo very lightly on scalp and mostly on hair.


After towel drying your hair, warm up some Argan oil on your palms and apply to the last half of your hair up to the roots, to get a beautiful shine.


So how do you like it? Let me know once you tried it and if you have any suggestions on improving this :) Ciao...

Note: All images in this post are courtesy of Pixabay.com

Friday, June 20, 2014

What Not To Buy [sigh]: Revlon Colorstay Moisture Stain in 001 India Intrigue

NOTE: This Review is only meant for this particular shade and not for the entire range

I never thought I would be including this beauty in the What Not To Buy's section, when I eagerly grabbed it from the local Rexall display. But well... sigh...


Revlon Colorstay Moisture Stain is the newest Lip product release from Revlon. You cannot find it in Revlon's own websites, which are notoriously slow in catching up with the product releases [Come on, Revlon, time to pick up some tech speed!].

You can find the details about the product in the listing here from Walgreens. 
Price was around $12.99 CAD when I picked it up. 
I didnt see this yet in the local Shoppers, so cant really comment which is the best place to buy this. 

My Experience:

Let me 1st gush about the positive aspects first. 
Look at that sleek square packaging. 
Revlon seems to be finally releasing some prettily packaged lippies, the one before this being the Colorburst Matte and Lacquer Balms with the snazzy lipcolor-ed casings.
I really adore the packaging - it is very similar to the YSL Glossy Stains, for which these are touted to be a possible dupe, at least in terms of packaging. 
Also appreciated is the fact that the packaging is not bulky or flimsy.
Good marks for that!


Next thing I love - the soft V shaped wands. They just glide. Its also very easy to get a precise application with this wand. 
I wish I could just buy the wand seperate to use with my other lip glosses.
Love!

Last thing I love - the color and the pigmentation. 
India Intrigue is a cool toned very wearable fushcia-ish pink. 
There are some gold shimmers in it which are hardly visible.
Pigmentation is pretty good, you can easily get medium coverage in one swipe. 

Look at that patchy swipe!
Now to the hard part - why I feel that this is not something you should spend your bucks on...
To start with - look at the patchy swatch. That kinda explains it all. 
The application is so patchy that it is very very hard to get a decent finish. 

This product is something like a cross between a lip gloss, liquid lipstick and a custard. 
While the feel is not uncomfortable, it is not very good either - I felt that this was a tad bit heavy on lips.

One swipe of the product on lips -I don't think the pic catches how patchy it looks!

There was no stickiness even though the glossy finish stayed for a good hour and a bit more.
The product never actually sets or dries, which means that any time you rub your lips together, the application goes all wonky again

The patchiness is so apparent that I find it impossible to wear this alone.
I wear this along with a semi sheer lip gloss or I wear a tinted lip balm like Revlon Lip Butter in Raspberry Pie underneath this one. 


I don't know if its just a problem with this shade alone - I have seen reviews where people have complained about this particular shade. 
So may be I picked the odd one out of the bunch.

The part is find weirdest is that this is supposed to be a stain - which it really doesn't do much. 
I could find slight tint but that doesn't qualify this to be called as a Stain!


As for other factors,
  • Scent - no harsh fragrance
  • Taste - Nah
  • Drying - Funnily enough, I felt a drying sensation around the lip edges but nowhere else!
  • Irritation - None

 Overall: In spite of the interesting name [which is one reason why I picked it!] India Intrigue is not a shade I would recommend to anyone.

Inviting guest posts - bring out the enthusiast, the admirer, the skeptic & the cynic in you

So, as you guessed from the title - if you have a post, I have a space for ya ..
For more details, click on the Write for me link on the top menu bar, cos I don't wanna repeat the same Ol' ol..


Thursday, June 19, 2014

Starring - NYX Chunky Dunk Hydrating Lippie in "Sex on the Beach"

So I am at office and talking to my friend over call about my latest makeup purchases and she asks me what shades I got in the NYX Chunky Dunky. And I reply - "I have Sex on the Beach and..".  I hear a Gasp and there's my cubicle-neighbor's face  with a a stunned look and I realize that once again the Curse of Weirdly and Uncomfortably Named Products have struck again. 

Funny name aside, this is the latest lippie innovation from NYX - their version of a Lip Crayon. I believe that they already have a chubby lip pencil but this is the one that actually qualifies as a lip crayon. 


It retails for $6 USD, has 13 shades and you can find everything NYX has to say here - Link

My Experience:

In my opinion, NYX got on the band wagon a lot late. I can find nothing special with this one from all the other Lip crayons I have tried so far. If I had got this one pretty early into my sojourn with Lip Crayons, I would probably enthused about their light weight texture but now, its like -"Hmmm..so what exactly is new"... Sad, but that's life!

 The packaging is pretty much the standard Lip crayon packaging - with the plastic casing matching the lip color inside. This is a twist up pencil so no sharpening. On the flip side, this also means that once the pointed edge has worn off, it will be hard to apply the shade with precision.

NYX advertises it as a Sheer to Medium pigmented product - but after trying out one of the brightest shades in the range, I would say "Sheer wash of color" - cos that is what it gives. The lip crayon applies smoothly and gives a nice sheer wash of color which is slightly more buildable. 


Sex on the Beach is an orange red - a perfect summer beach color IMHO. Don't be scared by the bold color in the tube, because the sheer coverage means that you can control how much color your want on your lips. On one swipe, it gives a more "My Lips but slightly Redder" look, like you have taken a sip of a red lollipop. There is no staining of lips, more like a delicate tint.

The satin finish stays for an hour and the color remains for another hour at the maximum. While this lippie does not give much hydration on its own, it doesn't dry out either- so unless you've really dry lips, you're good.  But this is still not good for a lippie that claims to be "Hydrating".


IMHO, NYX got confused on how it wanted to market the product - if you market a sheer color satin finish lippie as Hydrating, one would expect a Revlon-Lip-Butter performance or similar to NYX's own Butter Lip Balm. 

This is after multiple swipes - you can see how sheer the color looks

So in effect, what we have is a Crayon less-pigmented less-staying-powered version of the Butter Lipstick and nothing Wow. I am a bit disappointed :(

Other than that - no harsh scent, no bad taste, no irritation
.
Overall: Nothing special - if you like sheer lip crayons, go for it. However, I would recommend buying a Butter Lipstick for the same price - you get much more pigmentation and color range.

Monday, June 16, 2014

Summer Face Packs and Masks Series - Weekend [Day 2 and 3]

We went for a weekend getaway to Niagara on the Lakes. Its an amazing romantic location and being near to the Niagara river, there are some awesome bike trails where we spend our morning riding a local rented bike. If I could only spend everyday so leisurely.....

On the flip side, this meant a lot sun exposure, dust and loads of cheese-y food. So, this is was my beauty routine for the weekend:

Before Bath:
Apply warm coconut oil to your hair and skin and leave it on for at least 15-20mins.
Add a drop of Ylang Ylang or Jasmine oil to coconut oil and you don't need any perfume :)


If you can massage your skin and hair, all the more better.
Shampoo your hair to remove the oily effect. 

This is something that I did religiously as a kid in the warm tropical climate of coastal Kerala. Coconut oil is really good in giving moisture and protecting your skin and hair from sun exposure.

While going out:

- 30-45mins before  : Apply a sunscreen with SPF 50 on face. I also used a lip balm with SPF 20.

- Every 2 hours after - I used a sunscreen stick with SPF 50, to gloss over my face. This was a perfect outing accessory as I didn't have to reapply my makeup and I still got my sun protection.


 - Water, Water Everywhere - I kept refilling self on water - as lemon juice, coconut water, plain old H20, anything good. My suggestion is to avoid coffee or other drinks that dehydrate your body.


- Salad with everything - Fine dining means some type of Cheese, for a vegetarian. So, to balance the boat, I ordered side salads to keep my system happy


After coming back [night time rituals]

- Immediately as you reach your place: Clean your face and apply some aloe vera gel to get the protection and repair process of skin going

- 1 hour or at least 30mins before your sleep: This is the pack I prepared with easy-to-carry and easily available stuff while on a trip:
    - Lemon Juice [from half a lemon or lime]
    - Milk powder [or milk]
    - Oats  [if you can get a fine powdered version, its much better]
    - 2 drops from any of your favorite skin care oil [I use carrot seed oil]


Mix all the ingredients to get the consistency you like. I prefer a medium thick consistency so I use more oats powder.
Apply this all over your face and neck and leave it on for at least 20mins or till it gets dry.

Removing the pack: Dampen your face and slowly massage before removing to get a mild exfoliation effect.

Why I love this pack?
It is gentle and has some good ingredients to help with pigmentation and is also good for gentle exfoliation - in fact, it does everything necessary for an "After-Sun-Skin-Care" pack.

Did you try this? If so let me know how it worked out for you :)

Note: All Images in this post are courtesy of Pixabay.com 

Wednesday, June 11, 2014

Summer Face Packs and Masks Series - Day 1

This is a new series based on my actual skin care regime.
I am trying out various face packs for Summer and the ones I really like - I am putting it down here :)

Anti Tan Face Pack for Glowing Skin

So what you need is:


Rice Flour

RECIPE:

Mix 2 tbs of Lime Juice and 4 tbs of Milk together and keep this aside for 5-10mins.
Add 2tbs of Tomato juice and 1 spoon of yoghurt. 
Mix in rice powder to get firm consistency.


If you have sensitive skin, increase the amount of milk and rice powder in the pack.
If you have oily skin, reduce the amount of milk and increase the amount of rice powder in the pack.

Apply on your face for 15-20mins.

Wash off and immediately apply your favorite moisturizer. 

Now tell me how your skin looks and feels :)


Related Posts Plugin for WordPress, Blogger...